Get Your Travel eSIM Now Avoid Roaming Fees
You land in a new country, and instead of hunting for a local SIM card or expensive roaming plans, you simply turn on your phone with a travel eSIM already installed. A travel eSIM is a digital SIM card you purchase online and activate before or during your trip, letting you connect to local networks instantly. This means you get affordable data, keep your original number for calls and texts, and avoid the hassle of swapping physical cards. Travel eSIMs are the simplest way to stay connected while exploring the world.
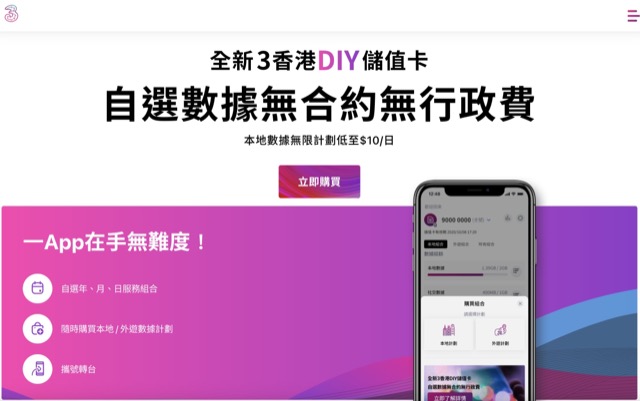
Why Your Next Trip Needs a Digital SIM
Your next trip needs a travel eSIM to eliminate the hassle of physical SIM cards and roaming fees. Instead of hunting for local vendors at the airport, you can install and activate a data plan before you leave home. This instant connectivity lets you navigate new cities, book rides, and stay reachable the moment you land. With a digital SIM, you also keep your primary number active for calls and texts, avoiding the risk of losing access to banking or two-factor authentication apps. Simply purchase a regional or country-specific plan, scan a QR code, and your data is ready. This setup saves hours and ensures you are never without a signal when you need it most.
What Makes Embedded SIMs Different From Plastic Cards
An embedded SIM (eSIM) is soldered directly into your device, unlike a plastic SIM card which is a removable physical chip. This means you never need to swap a tiny card when switching travel plans. Instead, you download a digital profile to the eSIM, eliminating the risk of losing or damaging a fragile plastic card. For travelers, this difference removes the need to carry multiple physical cards or find a tool to eject the SIM tray. Your device retains its waterproof seal since no slot is required. The core practical advantage is that activation happens entirely via software, not by handling hardware.
| Feature | Embedded SIM (eSIM) | Plastic SIM Card |
|---|---|---|
| Form Factor | Fixed chip inside device | Removable physical card |
| Switching Providers | Download a new profile | Physically insert new card |
| Risk During Travel | No card to lose | Card can be misplaced or damaged |
| Device Impact | No tray, maintains water resistance | Requires tray, compromises sealing |
How Instant Connectivity Changes Airport Arrivals
Instant connectivity via a travel eSIM transforms airport arrivals from a scramble into a seamless experience. Instead of hunting for Wi-Fi passwords or waiting in line for a local SIM, you activate your data plan moments after landing. This allows you to immediately summon a ride-share, navigate customs exits with live maps, and notify loved ones of your arrival. You can also access boarding passes for connecting flights or check real-time luggage claim status without delay. This eliminates the friction of arrival halls, making you feel prepared and in control from the very first step off the plane. Seamless arrival logistics become your new travel standard.
Top Signs You Should Switch to a Virtual SIM
You are juggling multiple physical SIM cards for different countries, risking loss or damage. You consistently pay steep roaming fees because switching local SIMs at each airport is inconvenient. You rely on instant connectivity upon landing, but a physical SIM requires time to insert and activate. You need to keep your home number active while using a local data plan, which a plastic SIM complicates. If you travel frequently or to multiple destinations on one trip, the hassle of swapping cards suggests you should switch. This virtual SIM convenience eliminates physical clutter and streamlines connection.
Top signs you should switch to a virtual SIM include managing multiple physical cards, paying high roaming fees, needing immediate connectivity, and requiring dual-number functionality—all solved by a single digital profile.
Comparing Costs: Roaming Plans vs. Local Data Cards
The moment I landed in Bangkok, my old roaming plan demanded $15 a day for 1GB, while local data cards at the airport offered 30GB for $10, but required queuing and swapping SIMs. With a travel eSIM, I tapped a local plan instantly on my phone for $8 for 20GB. The real savings hit when my friend’s roaming bill reached $90 after six days, while I paid $24 total using two different regional eSIMs. Q: Why is a travel eSIM cheaper than roaming? A: Because it bypasses your home carrier’s inflated daily rates and instead taps directly into local or regional prepaid data pricing, just like buying a local card without the physical swap.
Hidden Fees That Vanish With a Digital Profile
When you use a travel eSIM with a digital profile, the risk of unexpected billing disappears. Physical SIMs often trigger roaming fees from your home carrier, even for a single text message. A digital profile eliminates these surprise charges because you pre-purchase a specific data bundle. There are no hidden activation costs, per-minute billing, or daily connection fees applied by the local network. The eSIM simply connects you to the chosen plan with complete transparency. This zero-surprise billing model means the price you see at checkout matches the cost of your entire trip, with no vanished hidden fees creeping onto a separate monthly bill.
Why Prepaid Data Packs Often Beat Postpaid Abroad
When you’re abroad, prepaid data packs almost always beat postpaid because you control the spending. With a travel eSIM, you simply pick a plan upfront—no surprise bills after vacation. Postpaid roaming can tack on daily fees that add up fast, especially on longer trips. Prepaid, meanwhile, locks in your total cost immediately. Here’s why it wins:
- No hidden daily charges; just a one-time data bundle.
- You can choose a local data card (via eSIM) for the country’s best rates, not your home carrier’s inflated roaming.
- Unused data doesn’t carry over on postpaid, but prepaid lets you buy exactly what you need per destination.
Real-World Savings for a Two-Week Journey
For a two-week trip, the real-world savings with travel eSIMs become stark when you compare a $100+ roaming pass to a $25 local data card. Instead of paying your home carrier’s daily fee for 14 days, you buy a single regional plan. This typically saves you 60–75% on mobile data, leaving extra cash for experiences. The difference is especially clear with heavy use: streaming maps and translating apps don’t deplete a local plan’s generous 10GB allowance, while roaming quickly hits throttling limits. You avoid surprise bills entirely, keeping your budget under control.
| Destination | Roaming (2 weeks) | Data Card (2 weeks) | Your Savings |
|---|---|---|---|
| Europe | $140 | $28 | ~$112 |
| Japan | $120 | $35 | ~$85 |

Picking the Right Data Package for Your Itinerary
You’re standing in a Singapore hawker centre, phone buzzing with a map pin for laksa, but your eSIM only gave you 1GB. Next time, match the data to your habits—streaming videos require a 5GB+ plan, while navigation and WhatsApp use barely 1GB weekly. A 30-day package for a two-week trip often wastes money you could spend on chili crab. For hopping between Seoul and Tokyo, a regional eSIM with pooled data beats separate country packs. Check if your provider allows top-ups mid-trip, as unexpected layover binge-scrolling can drain your allowance. Always pick a plan that ends the day after your flight home, not before.
Short-Term Plans vs. Multi-Country Passes
When selecting a travel eSIM, the core choice is between Short-Term Plans and Multi-Country Passes. A Short-Term Plan is ideal for a single destination, offering local network speeds and a fixed data cap for a set number of days. In contrast, a Multi-Country Pass provides a shared data pool that works across multiple nations on a single itinerary. The former minimizes cost if you remain in one region; the latter eliminates the hassle of buying and swapping separate eSIMs for each border crossing. Evaluate your route: a single-week stay in Japan demands a short-term plan, while a two-week tour of France, Italy, and Spain justifies the broader coverage of a multi-country pass.
| Feature | Short-Term Plan | Multi-Country Pass |
|---|---|---|
| Best For | Single-country stays | Multi-nation itineraries |
| Network Speeds | Often faster local LTE | May throttle across borders |
| Setup Complexity | One installation | One installation for all |
| Cost Efficiency | Lower per-GB in one area | Higher upfront, saves per-trip hassle |
Speed Guarantees and Network Coverage Maps
When selecting a travel eSIM, verify the provider’s network coverage maps to confirm which local carriers are used at your exact destinations, as a map showing only national coverage may obscure regional dead zones. Speed guarantees are often tiered; “unlimited” data packages frequently throttle speeds after a fair-use threshold, so check the quoted Mbps in rural or congested urban zones. A guarantee of “standard speeds” can mean anywhere from 5 to 30 Mbps depending on the partner network. Cross-reference the map with your itinerary to avoid relying on a single carrier with poor regional reception.
Speed guarantees hinge on explicit Mbps limits per coverage zone; network maps must be granular enough to show specific partner infrastructure at your stops.
Data Caps That Actually Fit Your Usage
Ignore blanket 1GB daily caps that force you to conserve. Instead, match your cap to your real habits: heavy navigators and social scrollers need a minimum of 3GB weekly, while light email-only users thrive on a tiny 1GB monthly plan. Seek providers offering customizable data caps per trip segment, letting you allocate more to days with long commutes less to hotel-wifi evenings. A mismatched cap either wastes money or throttles your trip.
Fit your cap to your itinerary’s peaks, not a one-size-fits-all floor.
Setting Up a Digital SIM Before You Board
The night before my flight to Tokyo, I was still wrestling with a physical SIM card tray, fumbling with a paperclip in bad light. I wish I’d known the freedom of setting up a travel eSIM before you board. Sitting in my living room, I could have downloaded the eSIM profile directly to my phone, activated it against my home Wi-Fi, and tested the connection immediately. The process lets you configure APN settings and data roaming in advance, so the moment you land and switch off airplane mode, your phone is already live. There’s no frantic hunt for a local kiosk or unreliable airport Wi-Fi—just instant connectivity as you step off the plane, ready to navigate or message your hotel. That pre-trip setup turns a logistical headache into a seamless arrival.
Steps to Activate Without Physical Delivery
To activate a travel eSIM without physical delivery, first purchase a compatible eSIM plan online from your provider. You’ll instantly receive a QR code or an activation link via email. Next, ensure your device is connected to Wi-Fi, then scan the QR code in your phone’s cellular settings or tap the link to initiate automatic installation. After adding the eSIM profile, label it (e.g., “Travel Data”) and set your primary line for calls while toggling the eSIM for **data roaming**. Finally, activate the eSIM only when you arrive at your destination to avoid early billing.
Q: What happens if I don’t receive the QR code immediately?
A: Check your spam folder or contact provider support—most eSIMs are delivered within minutes, but delays can occur. If missing, request a resend via your account dashboard.
What to Do if Your Phone Isn’t Compatible
If your phone isn’t compatible, you must first check if it supports eSIM via the IMEI through your carrier. If it does not, your only practical option is to purchase a physical travel SIM card instead, or upgrade to an eSIM-compatible device before your trip. Some providers offer a QR code for manual profile installation, but this fails on locked or non-eSIM phones. Using a physical travel SIM is the most reliable workaround for incompatible devices. Q: Can I still use a digital SIM if my phone is incompatible? A: No, you must switch to a physical SIM card or use a portable hotspot device that supports eSIM.
Dual SIM Management Tips for Frequent Flyers
For frequent flyers, strategic dual SIM priority settings prevent costly data roaming. Assign your physical home SIM exclusively for voice calls and SMS verification, while your travel eSIM handles all mobile data. Disable automatic network selection on the home line to stop it from connecting to expensive partner towers abroad. On iOS, enable “Allow Cellular Data Switching” only if your eSIM has zero roaming charges, otherwise keep it off to avoid accidental fallback to your primary carrier. Finally, label your eSIM “Travel Data” in settings to prevent confusion when manually toggling lines for airline boarding passes or hotel check-ins.
Set physical SIM to “voice only,” keep mobile data locked to your eSIM, and disable automatic network search on the home line to eliminate surprise roaming fees.
Top Regions Where Mobile Connectivity Makes Sense
For a travel eSIM, Asia-Pacific is a top region where connectivity makes sense, covering hotspots like Japan, South Korea, and Thailand with instant local-speed data. Europe is equally compelling, as a single regional eSIM unlocks seamless 4G/5G across Paris, Rome, and Berlin without swapping physical SIMs. In North America, coverage is robust in urban corridors, though remote national parks in the US or Canada can still surprise you with weak signals. These regions reward you with high-speed roaming, bypassing dreaded Wi-Fi hunts and overpriced daily passes.
Europe’s Single Plan for Borderless Travel
Europe’s Single Plan for Borderless Travel, effectively realized through the Schengen Area, makes a travel eSIM exceptionally practical. You cross national borders without passport checks, but your mobile connectivity must keep pace. A single eSIM profile covers the entire zone, preventing the need for multiple local SIMs. This seamless cross-border data access mirrors the frictionless movement the plan permits, yet roaming data caps can still apply. Automatic network switching is the key benefit, maintaining service as you travel between countries. Does Europe’s Single Plan for Borderless Travel guarantee unlimited data across all member states? No, while it eliminates physical border controls, mobile operators often impose fair-use data limits within the plan, so a regional eSIM remains essential for heavy usage.
Asia’s Fragmented Market and Unified Solutions
Asia’s telecom landscape remains a patchwork of numerous local carriers with incompatible standards, from Japan’s NTT Docomo to Indonesia’s Telkomsel. A travel eSIM bypasses this fragmentation by providing unified regional access through a single profile, eliminating the need to juggle multiple physical SIMs. For a traveler moving from Bangkok to Seoul, this means seamless switching between networks without reconfiguration.
- Connects automatically to the strongest local network across countries like Thailand, South Korea, and Vietnam.
- Eliminates roaming fees from separate carriers per nation.
- Requires only one QR scan to activate coverage in over a dozen Asian markets.
Remote Destinations That Rely on Digital Profiles
In remote destinations like the Faroe Islands, Svalbard, or Patagonia’s outer fjords, local transport, hut booking, and emergency contact often exist only as digital profiles tied to a travel eSIM. Without a physical SIM kiosk, you must pre-load connectivity because these zones rely on QR-coded ferry passes, app-based trail check-ins, and cloud-hosted medical forms. A single eSIM profile becomes your proof of reservation and access token. Once you lose signal, you cannot retrieve your digital boarding or accommodation voucher. This dependency forces travelers to activate and test their eSIM before departure, ensuring the profile’s ICCID matches the region’s whitelisted network for automated validation.

Troubleshooting Common Connection Headaches
When your travel eSIM refuses to connect, the culprit is often a simple setting. Manual network selection is your first fix—turn off “Automatic” in your phone’s https://baztel.co/esim-plans/esim-singapore mobile network settings and pick a local carrier from the list. If that fails, toggle Airplane Mode for 30 seconds to force a fresh registration. Many headaches stem from incorrect APN settings; double-check the profile from your provider, as a single typo blocks data. Still stuck?
Permanently disable your primary physical SIM when roaming to avoid automatic network fights that confuse your eSIM.
Finally, verify your eSIM is “Turned On” for data and that roaming is enabled—even for “unlimited” plans, the toggle is mandatory for global networks.
What Happens When Data Runs Out Mid-Trip
If your eSIM data runs out mid-trip, your connection simply stops working until you top up. Most providers let you buy a data top-up directly from their app, often reactivating instantly. Without that, you’re offline until you find Wi-Fi. Don’t panic—your eSIM stays installed, so recharging just adds more data allowance to your existing plan, not a new SIM card.
Running out of data mid-trip means instant offline mode until you top up via the provider’s app, which usually works within seconds.
Fixing Activation Errors Without Customer Support
When a travel eSIM fails to activate, begin by verifying your device’s manual network selection rather than relying on automatic scanning, as this fixes many carrier connection mismatches. First, toggle Airplane Mode for 60 seconds to force a fresh signal handshake. If the profile remains inactive, delete and re-insert the eSIM via your phone’s settings, ensuring you have a stable Wi-Fi connection for the download. Double-check that APN settings match the provider’s documentation—incorrect values often block activation.
- Reboot the phone after installing the eSIM profile to finalize the configuration.
- Disable VPNs or ad-blockers that can interfere with the activation handshake.
- Enter the activation code manually if auto-detection fails in the provider’s app.
Switching Carriers While Abroad With Ease
Switching carriers while abroad with a travel eSIM is straightforward. Simply purchase a new eSIM plan from a different provider, then navigate to your device’s cellular settings to deactivate your current line and activate the new one. Ensure the new eSIM is set as your primary data line before use. Seamless carrier switching avoids the need to physically swap SIM cards, though you must confirm the new plan covers your destination. Some eSIM profiles allow you to temporarily suspend, rather than delete, your original line for easy reactivation later.
Switching carriers while abroad with a travel eSIM involves purchasing a new plan, activating it via settings, and confirming data coverage—no physical card changes required.
What Exactly Is a Travel SIM Card?

How it differs from a regular SIM and roaming
Where the data network comes from when you travel
Key Benefits of Using a Digital SIM Abroad
Why you avoid outrageous roaming fees
How one profile replaces multiple physical cards
Instant activation before you even board the flight
How to Set Up and Activate Your eSIM for a Trip
Device compatibility checks you must do first
Step-by-step installation from purchase to connect
What to do if you run into no-service problems
Choosing the Best Data Plan for Your Destination
